Overview
These instructions are used for onboarding Microsoft 365 Tenants as Infrastructure Connections within Netskope One DSPM. Such connections permit Netskope One DSPM to automatically discover, connect, and scan OneDrive, Teams sites, and SharePoint document libraries. Follow the steps below for each Microsoft 365 Account you wish to onboard to Netskope One DSPM.
Register Netskope One DSPM App in Microsoft 365
- Login to the Microsoft 365 admin center.
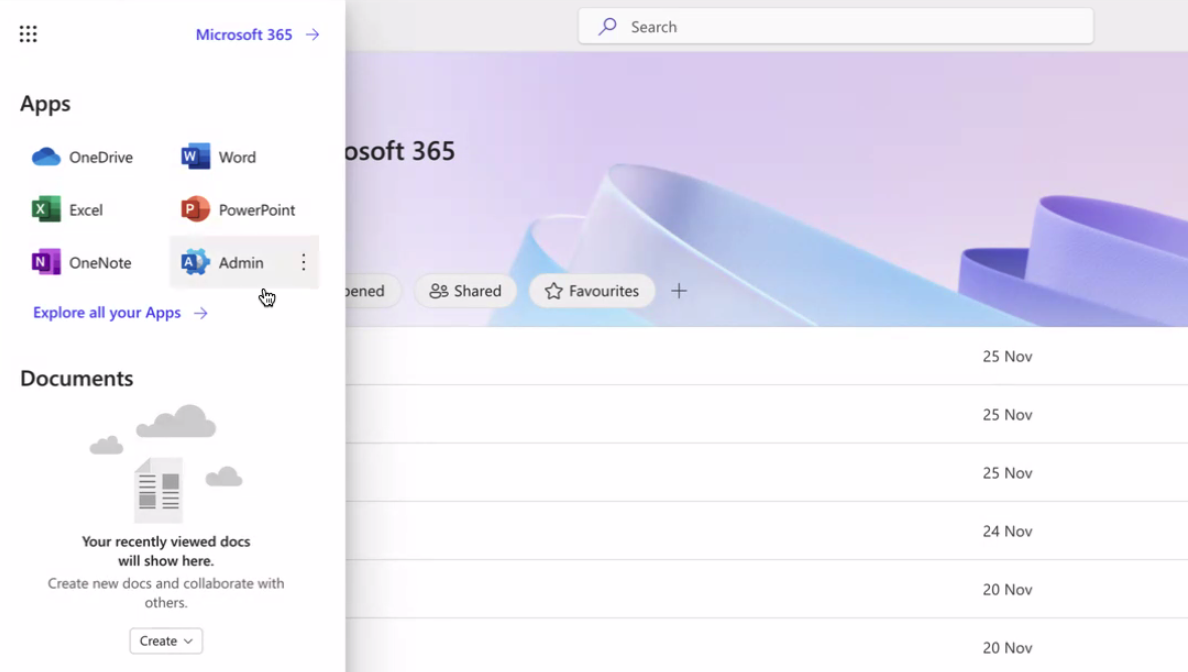
- From the left side nav, click Show all→All admin centers.
- Click on the hyperlink for Microsoft Entra.

- From the left nav, click Applications → App registrations.
- Click New registration.

- Create your new app registration. Include Netskope One DSPM in the name for your reference and keep settings as default. Then click Register.

- From the Overview screen, capture Application ID and Tenant ID (Directory ID) for use in Netskope One DSPM.

Create Client Secret
- From Netskope One DSPM App overview, navigate to Certificates & secrets and click on New client secret.
- Enter Description and validity of secret.

- On clicking Add, the secret is created. Copy and capture the Secret value as Application Secret.

Add API Permissions to Netskope One DSPM App
You'll need to add several API permissions for both Microsoft Graph and SharePoint for Netskope One DSPM to complete the infrastructure connection and auto-connect to data stores.
Microsoft Graph
- Click API Permissions from the left nav, then click Add a permission.
- Click the large button for Microsoft Graph → Application Permissions.

- Search for and add all of the following permissions by checking the box to the left of the permission name.
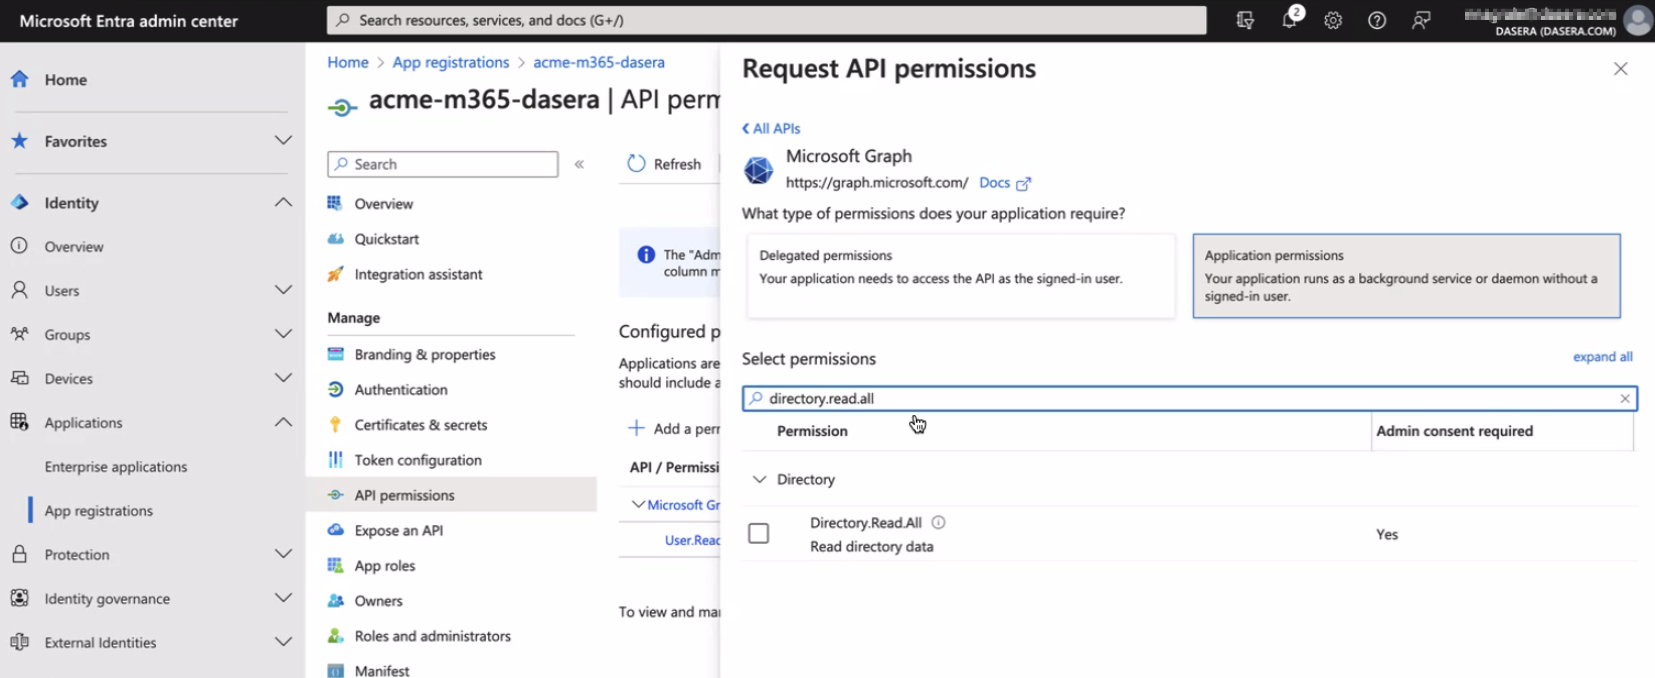
Directory.Read.All
Files.Read.All
Group.Read.All
User.Read
User.Read.All
SharePoint
- Click API Permissions from the left nav, then click Add a permission.
- Click the large button for Microsoft Graph → Application Permissions.
- Scroll down until you see the button for SharePoint. Click on it then click Application Permissions.

- Search for and add
Sites.Read.Allby checking the box to the left of the permission name.
Once you've added all the permissions, click Grant Permissions on the Configured permissions screen to finish granting admin consent for all configured permissions.

Create Netskope One DSPM Infrastructure Connection
- Log into Netskope One DSPM
- Navigate to the Administration > Infrastructure Connections > Microsoft 365 tab
- Click the Add Infrastructure button.
- Click Next.
- Disable auto-discovery and auto-connection to Apps (only if desired).
- Click Next.
- Enter the following values:
| Field | Value |
|---|---|
| Tenant Name | Any value (this is used to identify your infrastructure connection within the Netskope One DSPM UI). |
| Tenant ID | Enter the Tenant ID captured in Step 7 in Register Netskope One DSPM App in Microsoft 365 section above. |
| Application ID | Enter the Application ID captured in Step 7 in Register Netskope One DSPM App in Microsoft 365 section above. |
| Application Secret | Enter the Application Secret (value) captured in Step 3 in Create Client Secret section above |
- Click Next.
- Select if you want Netskope One DSPM to scan all data or selected groups, which appear as a drop-down pick list.
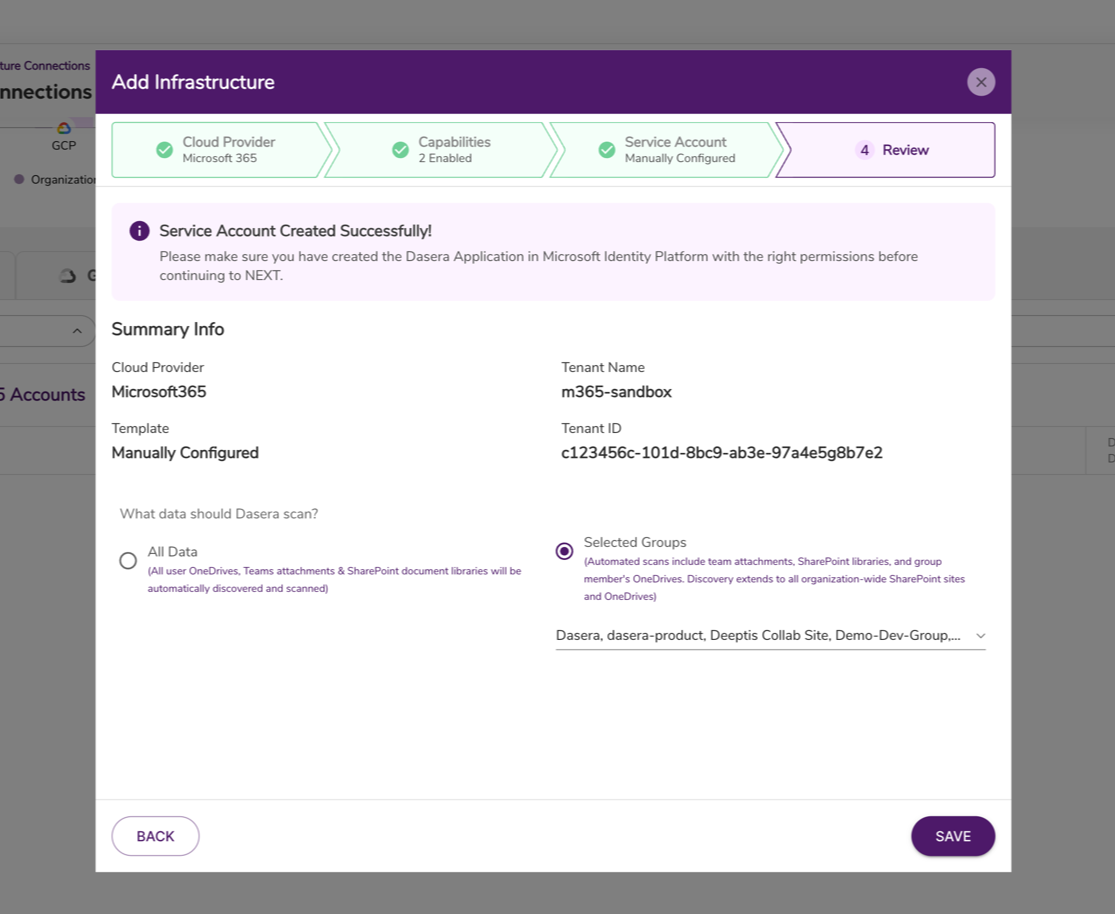
- Hit Save to complete the Infrastructure connection.
Next Steps
- Repeat the above steps if you have additional Microsoft 365 Accounts to onboard in Netskope One DSPM.
- Review auto-connected OneDrive, SharePoint, and Teams sites. You can also connect to other OneDrive and SharePoint sites manually.