These manual instructions for configuring the Netskope One DSPM application for Amazon Web Services (AWS) remain valid but have since been replaced with our automation-based means, as described in the following articles:
Overview
Netskope One DSPM supports the ability to onboard, connect to, and scanning your AWS organizations and accounts. These capabilities require programmatic access to connect to and scan the Data Stores, including configuring specific AWS users or IAM roles.
Configure AWS Access
Begin by configuring an AWS User or IAM Role dedicated to Netskope One DSPM's use. Which you configure depends on whether your application is Netskope One DSPM-hosted or self-hosted.
Option A: Create AWS IAM Role
This option is recommended for Netskope One DSPM-hosted tenants.
- Log into the AWS IAM Console
- Create a new IAM Role
- Using the on-screen wizard, configure the following values:
- Name: Netskope One DSPMRole
- Permissions
- AmazonEC2ReadOnlyAccess: for getting regions and instance IDs
- AmazonEC2FullAccess: required for scanning EBS volumes
- AmazonElasticFileSystemFullAccess: required for scanning EFS volumes
-
AmazonRDSReadOnlyAccess: for discovering RDS clusters
- Optionally, include AmazonRDSFullAccess instead of permission B above if you plan to connect with RDS and Aurora data stores via Snapshots.
- AmazonRedshiftReadOnlyAccess: required for discovering RedShift clusters, otherwise optional
- AmazonAthenaFullAccess: required for discovering Athena clusters and running scans, otherwise optional
- AmazonS3ReadOnlyAccess: also required for scanning Athena, otherwise optional
- AmazonDynamoDBReadOnlyAccess: required for scanning DynamoDB data stores. Also contains necessary permission for AWS tag ingestion.
- IAMReadOnlyAccess: required for Privilege Analysis on S3, otherwise optional
- Save your new IAM Role
- Make note the Role ARN value, then proceed to the next step
Option B: Configure AWS User
This option is recommended for self-hosted instances (e.g. installed via AMI installation).
- Log into the AWS IAM Console
- Click on "Users" in the left navigation under Access Management
- Click on the blue "Add users" button on the top right of the screen
- Enter a User name of your choice (e.g. Netskope One DSPM_IAM)
- Check the "Programmatic access" check box in the Access type section.
- Click on the blue “Next: Permissions” button on the bottom of the page.
- Set permissions for this user by attaching policies that give Netskope One DSPM access to the following resources
- AmazonEC2ReadOnlyAccess: for getting regions and instance IDs
- AmazonEC2FullAccess: required for scanning EBS volumes
- AmazonElasticFileSystemFullAccess: required for scanning EFS volumes
-
AmazonRDSReadOnlyAccess: for discovering RDS clusters
- Optionally, include AmazonRDSFullAccess instead of permission B above if you plan to connect with RDS and Aurora data stores via Snapshots.
- AmazonRedshiftReadOnlyAccess: required for discovering RedShift clusters, otherwise optional
- AmazonAthenaFullAccess: required for discovering Athena clusters and running scans, otherwise optional
- AmazonS3ReadOnlyAccess: also required for scanning Athena, otherwise optional
- AmazonDynamoDBReadOnlyAccess: required for scanning DynamoDB data stores. Also contains necessary permission for AWS tag ingestion.
- IAMReadOnlyAccess: required for Privilege Analysis on S3, otherwise optional
- Click the blue “Next: Tags” button on the bottom of the page.
- Optionally add any tags you would like to describe this Netskope One DSPM user.
- The permission
tag:GetResourcesis required for AWS tag ingestion.
- The permission
- Click the blue “Next: Review” button on the bottom of the page.
- Review the details and then click the blue “Create user” button on the bottom of the page.
- Copy the Access Key ID and Secret Key, then proceed to Step 2 below.
Configure Trust Relationship
This step is required only if you are using an assume role-based approach for authorizing connections between Netskope One DSPM and your AWS infrastructure.
Follow these steps to configure a trust relationship between the "Netskope One DSPMRole" IAM Role and a new IAM Role called “Netskope One DSPMLaunchRole”. Otherwise, you can skip ahead to the next step.
- Log into the AWS IAM Console
- Create a new IAM Role
- Using the on-screen wizard, configure the following values:
- Name: Netskope One DSPMLaunchRole
- Save your new IAM Role
- Within the role header, make note of its Role ARN value
- Select the "Netskope One DSPMRole", then navigate to the Trusted Relationships tab
- Edit the Trusted Entities JSON to add an additional line under Principal which references the "Netskope One DSPMLaunchRole" Role ARN value. See below for an example (be sure to edit the account number portion if you cut-and-paste)
- Save your changes
{
	"Version": "2012-10-17",
	"Statement": [
		{
			"Sid": "AllowAssumeRoleForAnotherAccount",
			"Effect": "Allow",
			"Principal": {
				"AWS": "arn:aws:iam::946157925481:root"
			},
			"Action": "sts:AssumeRole",
			"Condition": {
				"StringEquals": {
					"sts:ExternalId": "<enter-external-id-from-UI>"
				}
			}
		}
	]
}
The value for "sts:ExternalId" is automatically generated during AWS account onboarding and can be retrieved from the screen while entering the Account Name .
- Within EC2, select your Netskope One DSPM instance, then navigate to Actions > Security > Modify IAM Role
- In the IAM Role field, select "Netskope One DSPMLaunchRole"
- Click the Save button
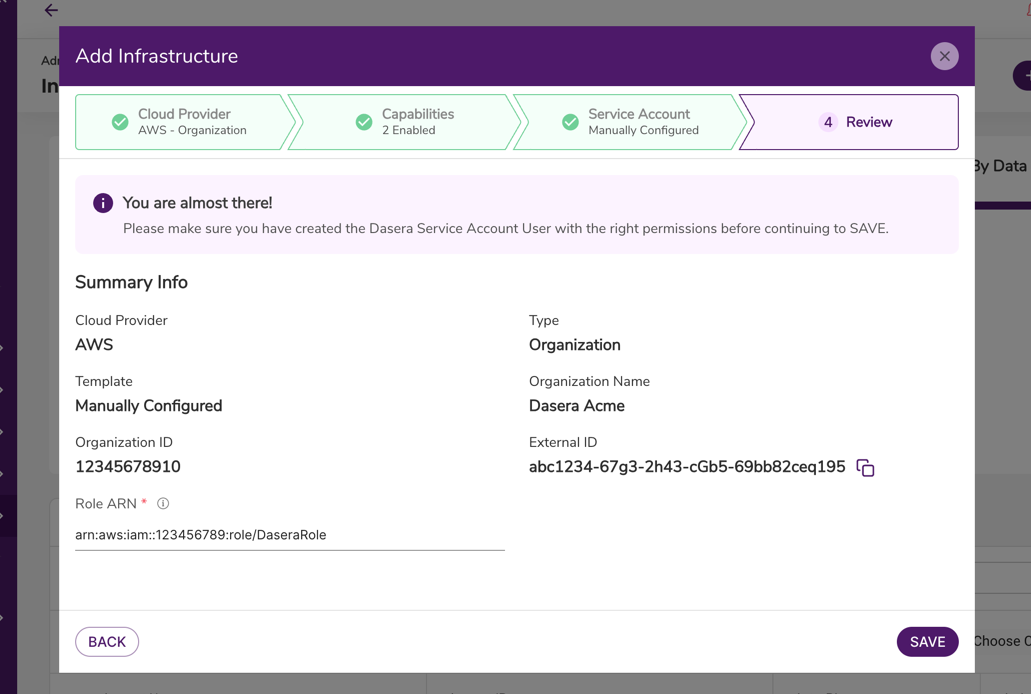
Create a Netskope One DSPM Infrastructure Connection
At this point, your configuration of AWS is complete, and Netskope One DSPM can now be connected to your infrastructure.
- Log into your Netskope One DSPM instance
- Navigate to Administration > Infrastructure Connections
- On the next screen, click the AWS tab
- Complete the Account Name field
Configure an AWS IAM Role
- Select the Using IAM Role radio button.
- In the Role ARN field, enter the corresponding value from the Create AWS IAM Role step above.
If your tenant is Netskope One DSPM-hosted, complete these additional steps:
- Make note of the Netskope One DSPM-generated External ID value
- Log into the AWS IAM Console.
- Select the "Netskope One DSPMRole", then navigate to the Trusted Relationships tab.
- Edit the Trusted Entities JSON to add an additional line under Principal which references the Netskope One DSPM-generated External ID value. See below for an example (be sure to edit the account number portion if you cut-and-paste).
- Save your changes and continue the next steps within your Netskope One DSPM instance.
{
    "Version": "2012-10-17",
    "Statement": [
        {
            "Effect": "Allow",
            "Principal": {
                "Service": "ec2.amazonaws.com"
                "ARN": [arn:aws:iam::123456789012:role/Netskope One DSPMLaunchRole]
            },
            "Action": "sts:AssumeRole",
            "Condition": {
                "StringEquals": {
                    "sts:ExternalId": "abcd1234-6578-efgh-9012-ijklmnopqrst"
                }
            }
        }
    ]
}
Optionally, the following policy conditions should be attached if you plan to connect with RDS or Aurora data stores via Snapshots.
{
              "Effect": "Allow",
              "Action": [
                "ec2:AttachInternetGateway",
                "ec2:ModifyVpcAttribute",
                "ec2:AuthorizeSecurityGroupIngress"
              ],
              "Resource": "*",
              "Condition": {
                "StringEquals": {
                  "ec2:ResourceTag/Vendor": "Netskope One DSPM"
                }
              }
            },
            {
              "Effect": "Allow",
              "Action": [
                "ec2:CreateRoute",
                "ec2:CreateVpc",
                "ec2:CreateInternetGateway",
                "ec2:CreateSecurityGroup",
                "ec2:CreateSubnet"
              ],
              "Resource": "*"
            },
            {
              "Effect": "Allow",
              "Action": [
                "ec2:CreateTags"
              ],
              "Resource": "*",
              "Condition": {
                "StringEquals": {
                  "ec2:CreateAction": [
                    "CreateVpc",
                    "CreateInternetGateway",
                    "CreateSecurityGroup",
                    "CreateSubnet"
                  ]
                }
              }
            }
- Confirm the Auto-Discovery setting:
- If Auto-Discovery is enabled (example below), Netskope One DSPM will start discovering and cataloging your AWS Data Stores under the Data Stores > Data Stores Inventory screen.
- Otherwise, you can later connect to individual Data Stores
- Click the ACKNOWLEDGE button. Netskope One DSPM will verify the connection and kick off the initial auto-discovery scan (if enabled).