Overview
These instructions are used for onboarding GCP Projects and Organizations as infrastructure connections within Netskope One DSPM via Terraform. Such connections permit Netskope One DSPM to discover your available data stores and facilitate scanning and classification activities. You will repeat these steps for each GCP Project or Organization you wish to onboard to Netskope One DSPM.
For these instructions, you will start activity within Netskope One DSPM, next be directed to perform actions within the Terraform CLI, GCP CLI or Console, then finally return to Netskope One DSPM to complete the connection.
Verify that the below software tools are installed and configured on your machine before continuing. You would need to have the following toolset installed and configured while invoking them from the terminal.
In addition, ensure that you validate the latest version of these toolsets by running the following commands at your terminal prompt:
terraform --version (Ver 1.5.1)
gcloud --version (Ver 438.0.0)
Instructions for Infrastructure Connection
Individual GCP Project
You will repeat these steps for each individual GCP Project you wish to onboard within the Netskope One DSPM application.
Steps to Complete Netskope One DSPM Infrastructure Connection
- Log into Netskope One DSPM.
- Navigate to Administration → Infrastructure Connections → GCP tab.
- Click the Add Infrastructure button in the upper right.
- Click ADD PROJECT.
- On the Capabilities tab, set the following toggles depending on your discovery & classification needs:
| Toggle Description | Details |
|---|---|
| Auto-Discover New Data Stores | Enables the auto-discovery of newly-created data stores, to ensure that DSPM is always aware of all possible data stores |
| Auto-Discover Unmanaged Data Stores |
Enables the auto-discovery of data stores on your disk volumes, to also ensure that DSPM is always aware of all possible data stores. This is disabled by default, as it can lead to performance impacts depending on the volume of disks to be scanned. |
| Ingest the Policy Tag Taxonomy | Enables ingestion of GCP policy tags associated with each connected data store, for use within both filters and and downstream policy conditions. |
| Authorize Data Store Snapshots Access | For low-touch onboarding using snapshots, enables the inclusion of the necessary IAM permissions within the Terraform script generated by DSPM. This infrastructure-as-code (IaC) file is generated in the next step of infrastructure onboarding. |
- Click NEXT.
- Enter the following values:
| Field | Value |
|---|---|
| Project Name | Any value (this is used to identify your infrastructure connection within Netskope One DSPM). |
| Project ID |
Obtain from your GCP console: 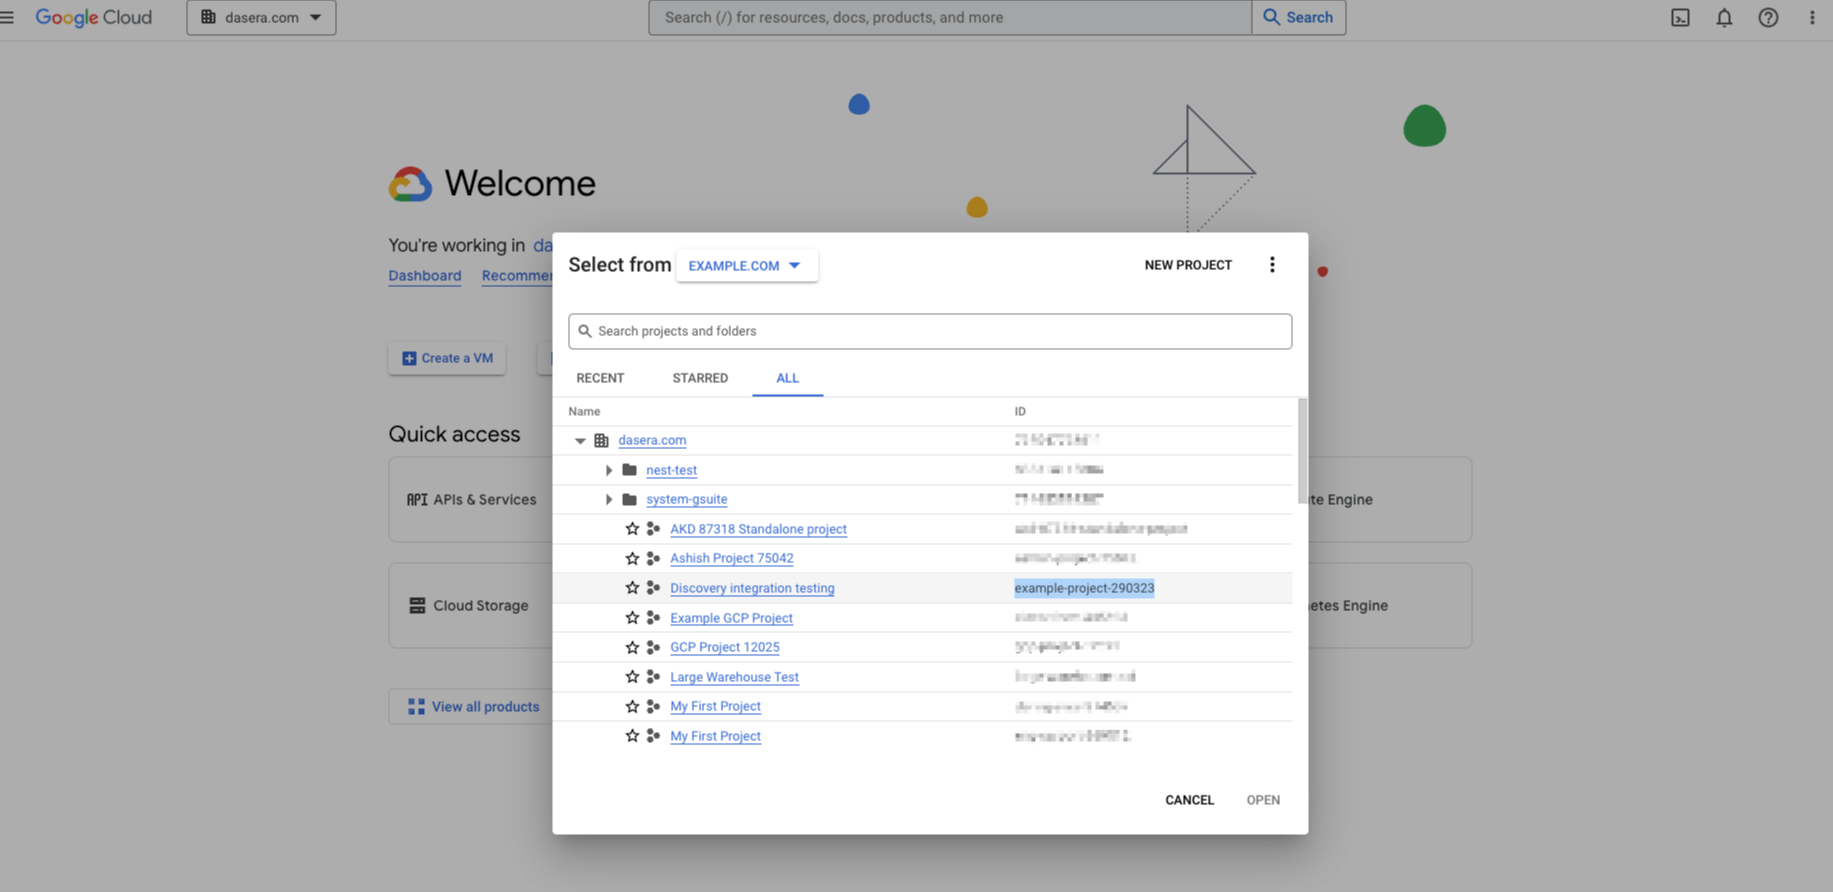 |
| Netskope One DSPM Service Account Name | Will default to Netskope One DSPM-service-account. Note that this value needs to be unique to each onboarded project. |
- Select Terraform.
- Click DOWNLOAD TEMPLATE to download a .zip file with Terraform scripts. Leave Netskope One DSPM open with the Add Infrastructure modal to return to later.

The next several steps are completed within the terminal on your local machine:
- Extract the .zip file from your downloads folder. A folder is created called account, which will contain the relevant Terraform files.
- Run the following command: terraform init. The command will run with the text Initializing the backend…
- Once complete, you will see success text in green: Terraform has been successfully initialized, with additional output text below.
- Run the script by running the command: terraform apply. You will see a warning here if you are not logged in or have improper credentials within GCP.
- You will see an output of resources to be created, including Project Name, Netskope One DSPM Service Account Name, and Project ID. Enter yes to continue.
- Once finished, you will see success text in green: Apply complete! Resources: XX added, 0 changed, 0 destroyed.
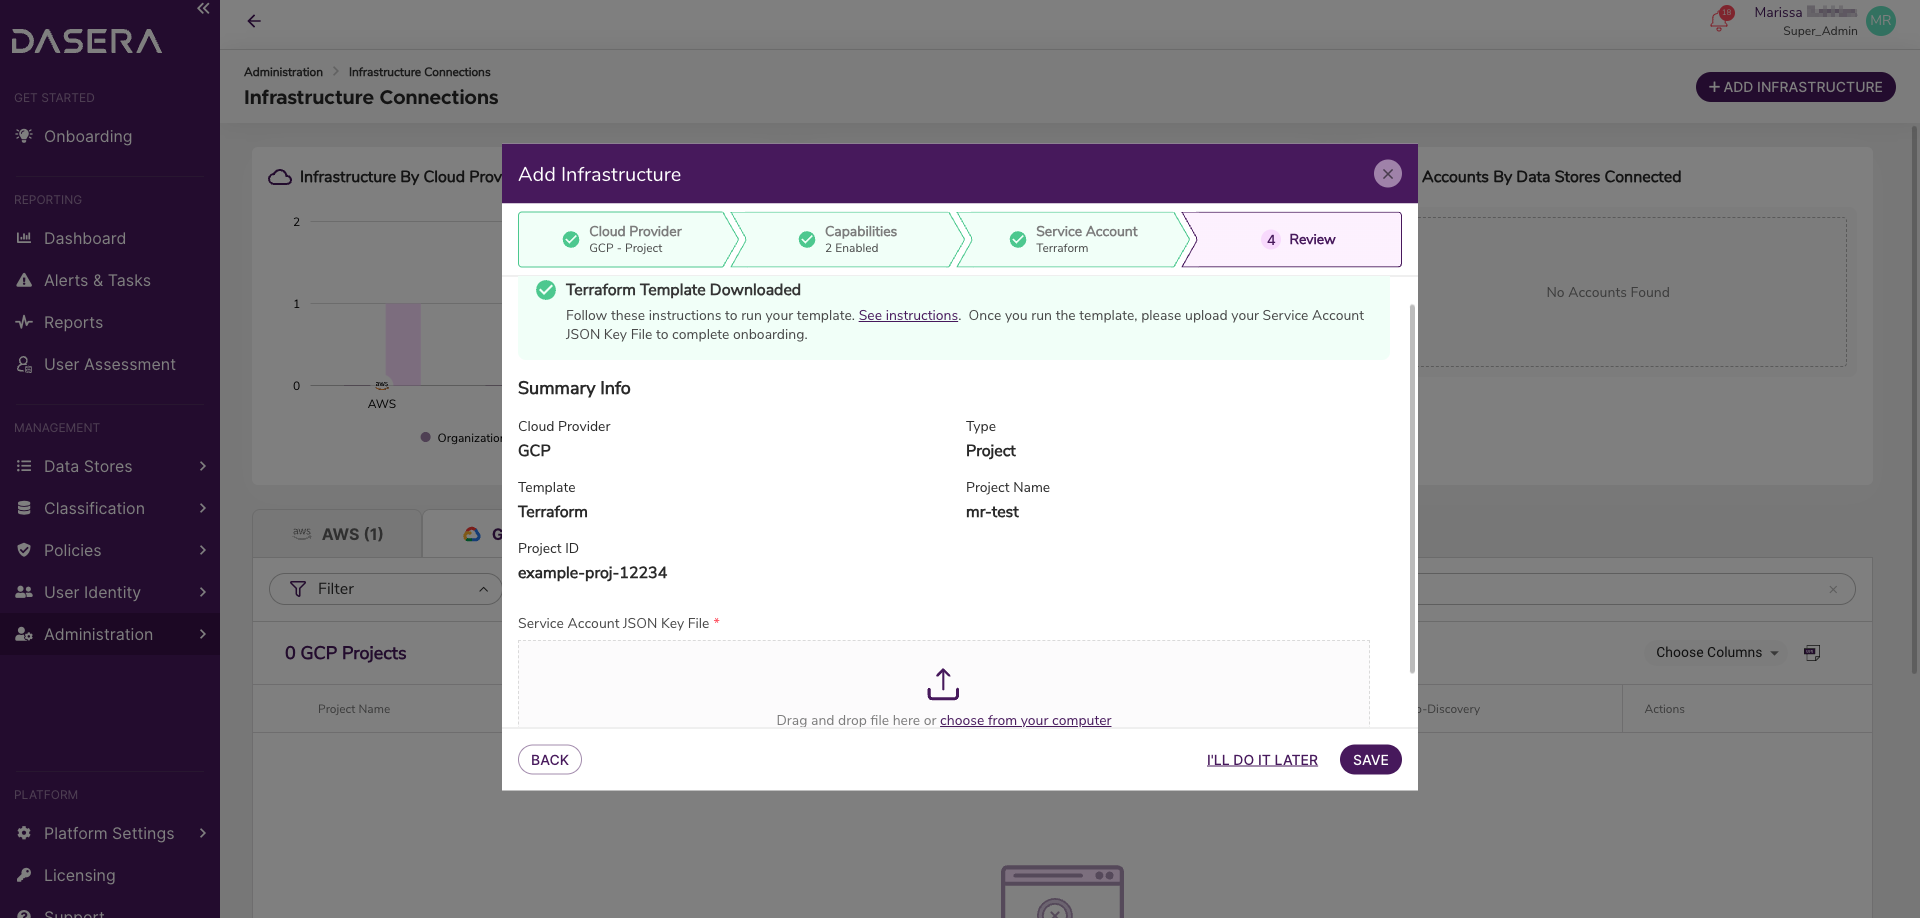
Return to Add Infrastructure modal in Netskope One DSPM and click I'VE ALREADY RUN THE TEMPLATE. Take the following steps to complete the infrastructure connection.
- GCP Projects require a Service Account .json key file. This file generates as output to your account folder described above once you've successfully run the Terraform script.
- Locate the account file in your downloads folder from Step 1 above.
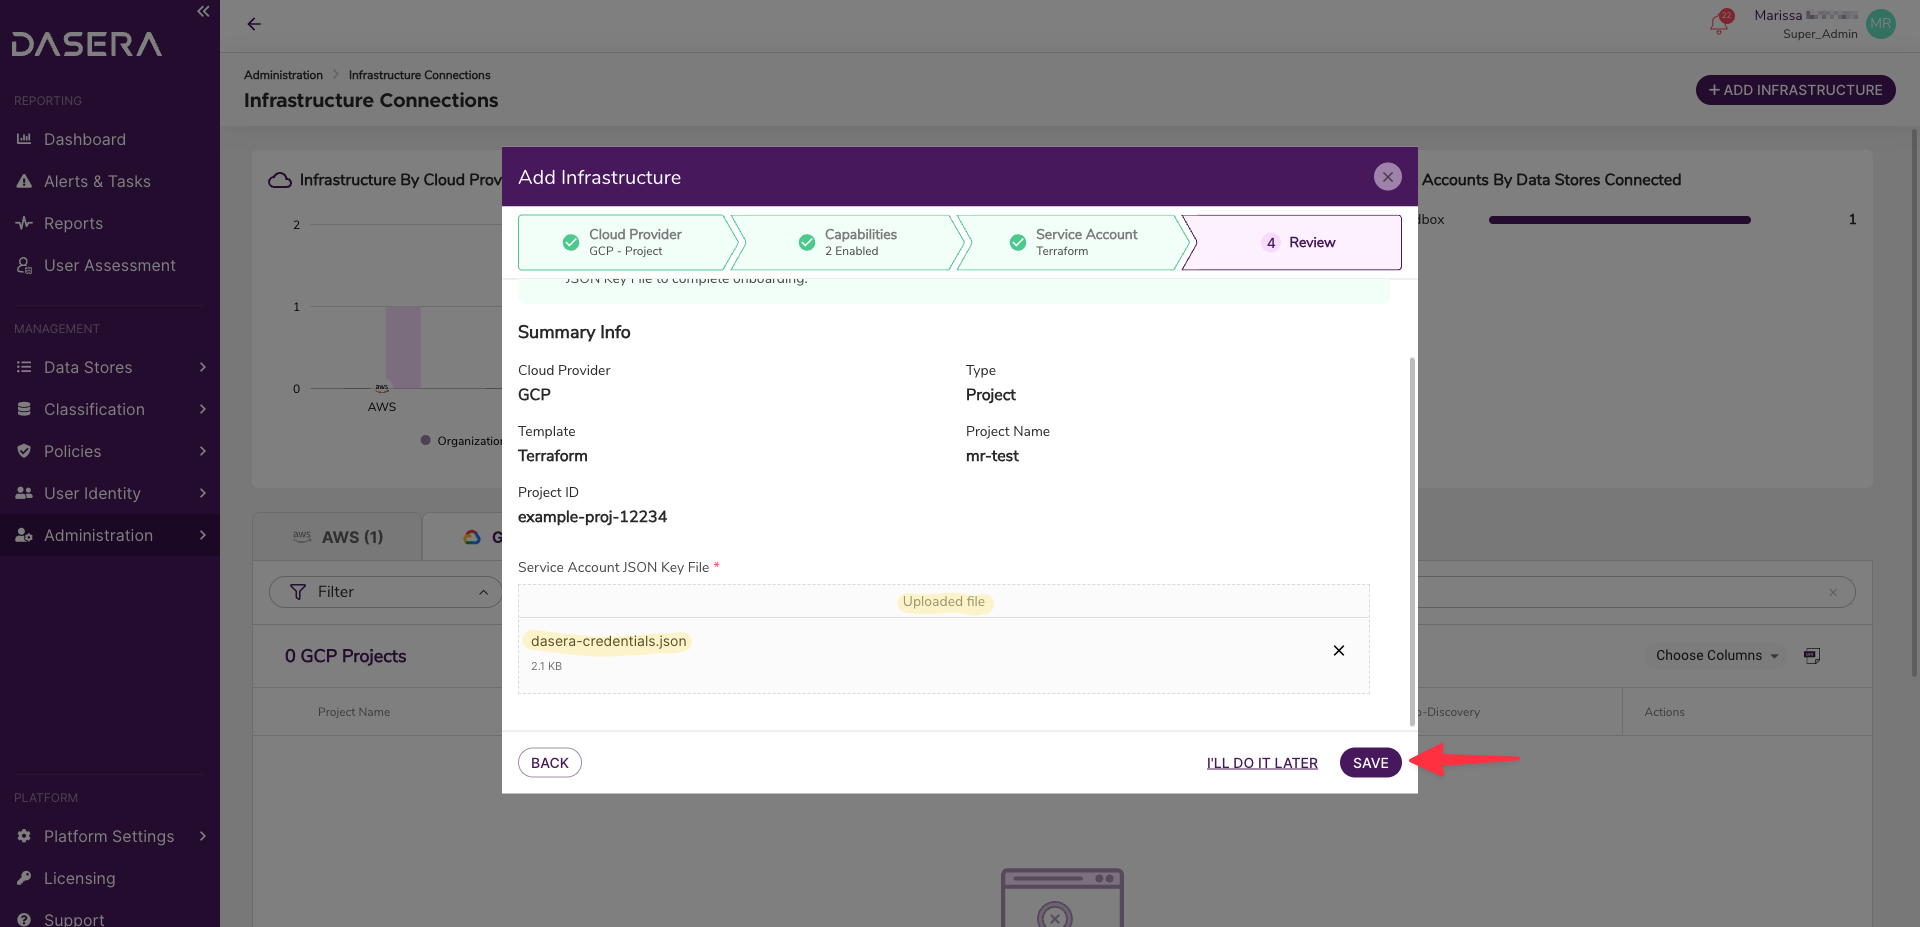
- Drag and drop the Netskope One DSPM-credentials.json file into the Add Infrastructure modal where you see upload icon.
- Click SAVE.
Your GCP Project Infrastructure connection is now complete, and you are able to discover data stores for analysis.
GCP Organization
You will perform these steps once for each GCP organization you wish to onboard within the Netskope One DSPM application. Any changes to your organization's membership units will be automatically accommodated.
Steps to Complete Netskope One DSPM Infrastructure Connection
- Log into Netskope One DSPM.
- Navigate to Administration → Infrastructure Connections → GCP tab.
- Click the Add Infrastructure button in the upper right.
- Click ADD ORGANIZATION.
- On the Capabilities tab, set the following toggles depending on your discovery & classification needs:
| Toggle Description | Details |
|---|---|
| Auto-Discover New Projects | Enables the auto-discovery and onboarding of newly-discovered organization members, ensuring that your accounts list always remains accurate within DSPM |
| Auto-Discover New Data Stores | Enables the auto-discovery of newly-created data stores, to ensure that DSPM is always aware of all possible data stores |
| Auto-Discover Unmanaged Data Stores |
Enables the auto-discovery of data stores on your disk volumes, to also ensure that DSPM is always aware of all possible data stores. This is disabled by default, as it can lead to performance impacts depending on the volume of disks to be scanned. |
| Ingest the Policy Tag Taxonomy | Enables ingestion of GCP policy tags associated with each connected data store, for use within both filters and and downstream policy conditions. |
| Authorize Data Store Snapshots Access | For low-touch onboarding using snapshots, enables the inclusion of the necessary IAM permissions within the Terraform script generated by DSPM. This infrastructure-as-code (IaC) file is generated in the next step of infrastructure onboarding. |
- Click NEXT.
- Enter the following values:
| Field | Value |
|---|---|
| Organization Name | Any value (this is used to identify your infrastructure connection within Netskope One DSPM). |
| Organization ID |
Obtain from your GCP Organizations console. 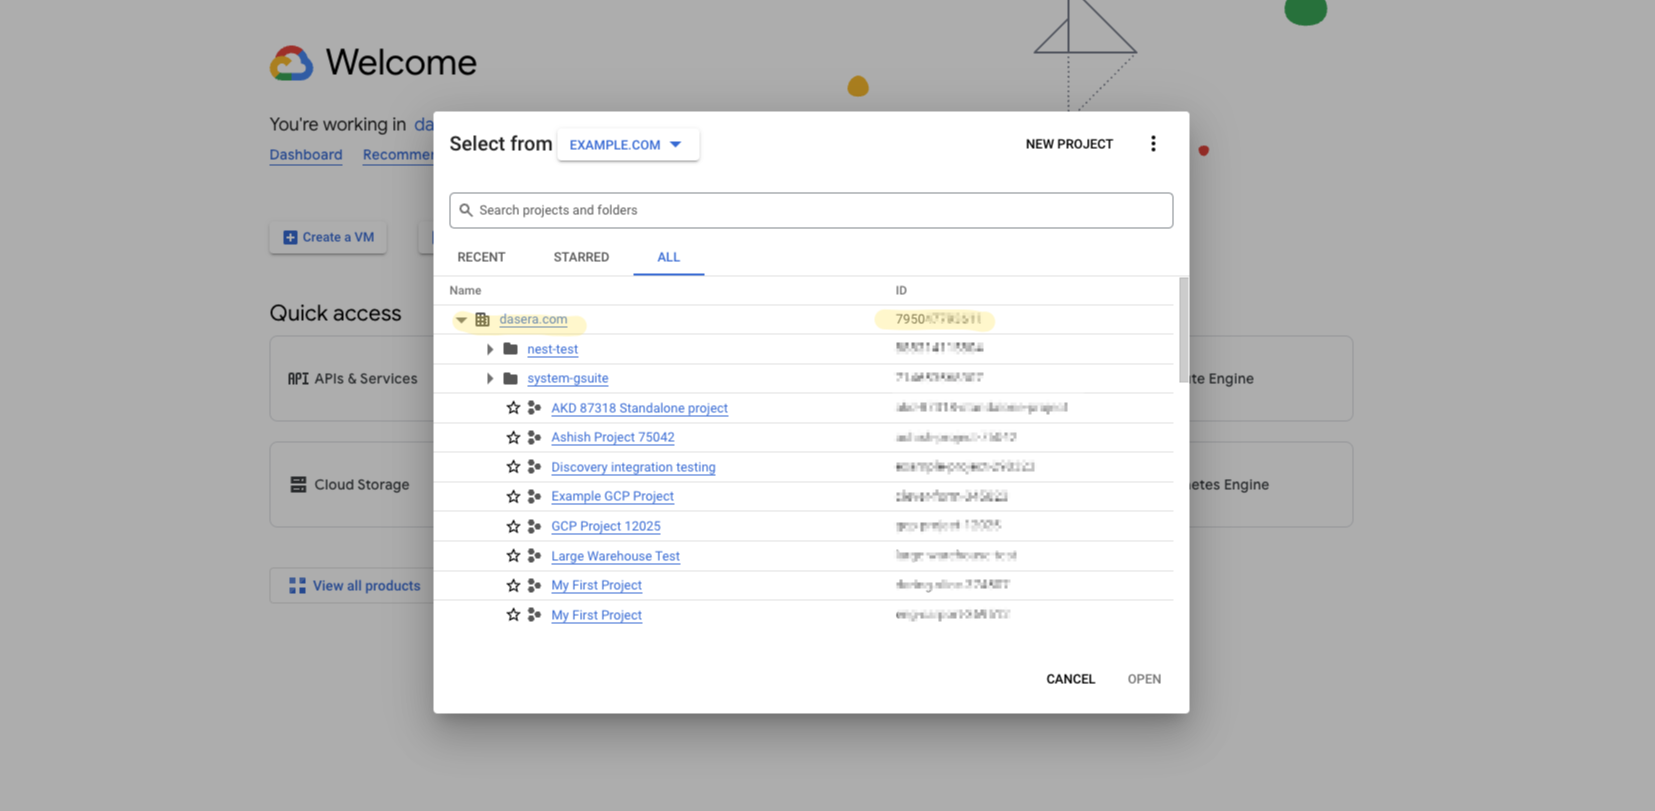 |
| Netskope One DSPM Service Account Name | Will default to Netskope One DSPM-service-account. Note that this value needs to be unique to each onboarded organization. |
- Select Terraform.
- Click DOWNLOAD TEMPLATE to download a .zip file with Terraform scripts. Leave Netskope One DSPM open with the Add Infrastructure modal to return to later.

The next several steps are completed within the terminal on your local machine:
- Extract the .zip file from your downloads folder. A folder is created called org, which will contain the relevant Terraform files.
- Run the following command: terraform init. The command will run with the text Initializing the backend…
- Once complete, you will see success text in green: Terraform has been successfully initialized, with additional output text below.
- Run the script by running the command: terraform apply. You will see a warning here if you are not logged in or have improper credentials within GCP.
- You will see an output of resources to be created, including Service Account Role, Organization Name, and Organization ID. Enter yes to continue.
- Once finished, you will see success text in green: Apply complete! Resources: XX added, 0 changed, 0 destroyed.
Return to Add Infrastructure modal in Netskope One DSPM and click I'VE ALREADY RUN THE TEMPLATE. Take the following steps to complete the infrastructure connection.
- GCP Organizations require a Service Account .json key file. This file generates as output to your account folder described above once you've successfully run the Terraform script.
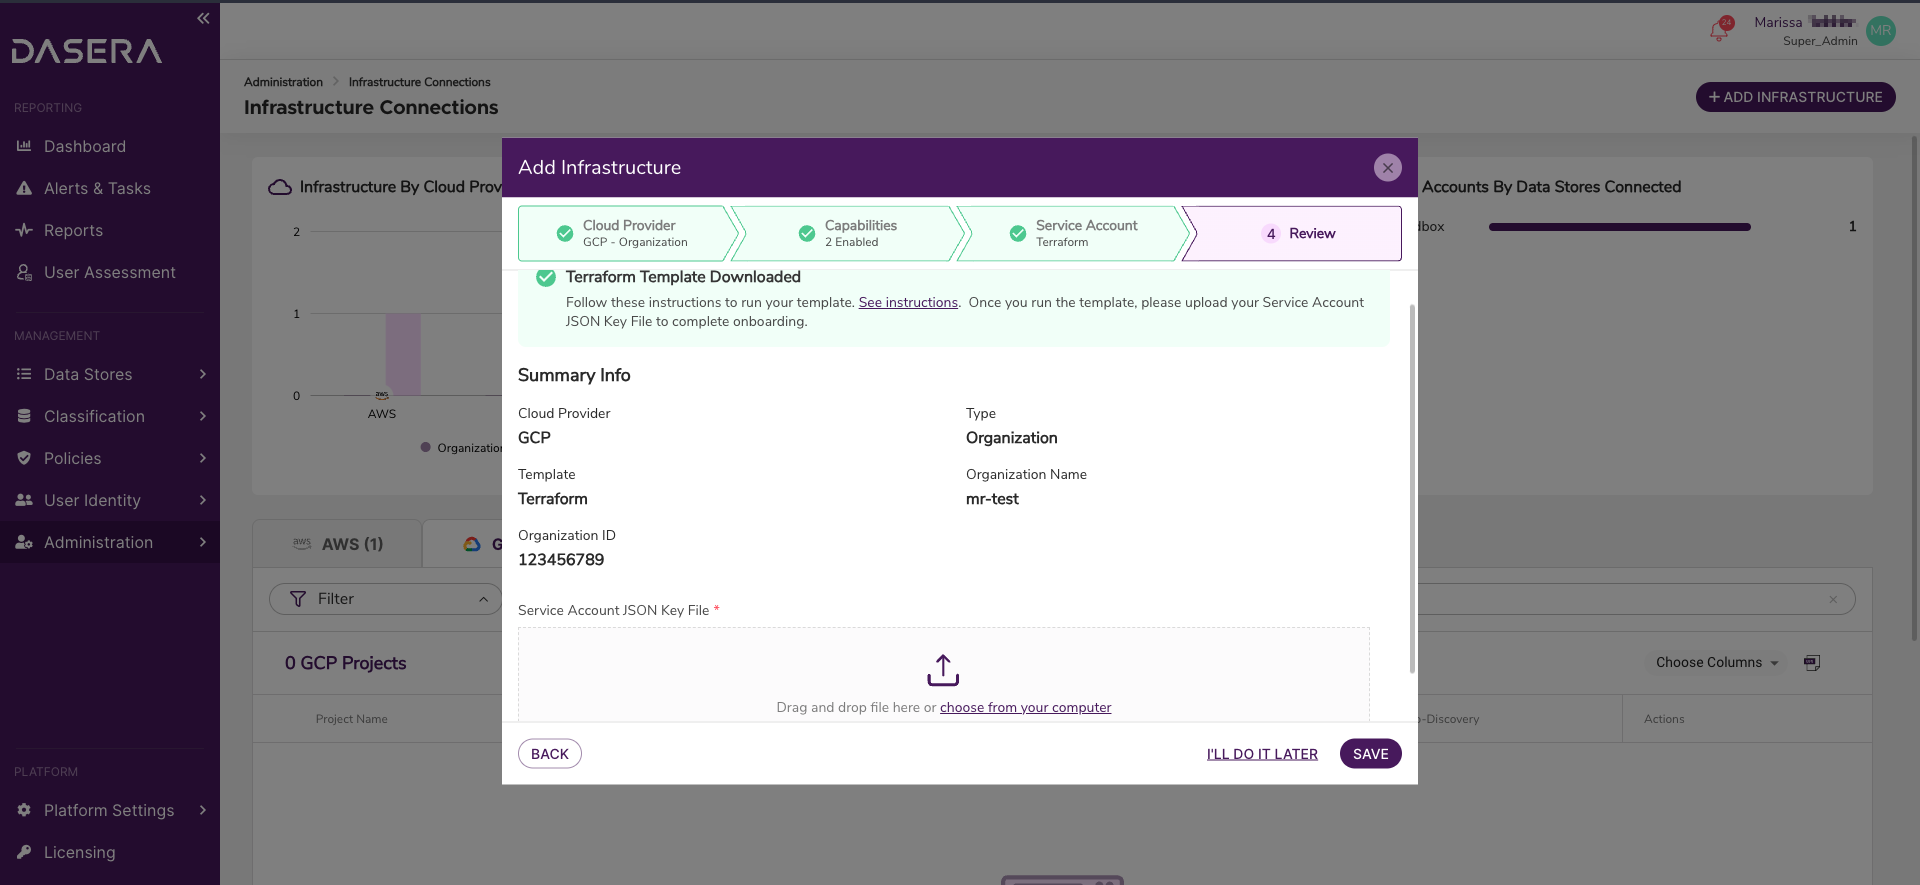
- Locate the org file in your downloads folder from Step 1 above.
- Drag and drop the Netskope One DSPM-credentials.json file into the Add Infrastructure modal where you see upload icon.
- Click SAVE.
Your GCP Organization Infrastructure connection is now complete, and you are able to discover accounts within the organization and data stores for analysis.
Note: For each GCP Project infrastructure connection, if it is a member of the Organization being onboarded, we consolidate that individual Infrastructure Connection to fall underneath the Organization within the UI.
Next Steps
- If you have additional GCP Organizations or Projects to onboard in Netskope One DSPM, repeat the above steps.
- Connect your discovered Data Stores. For more information, visit our Connecting GCP Data Stores category and select the article(s) applicable to the Data Store Type(s) you wish to connect.