Overview
The instructions below are for launching the Netskope One DSPM AMI in your own AWS VPC. To obtain a trial AMI, please contact sales@Netskope One DSPM.com. Netskope One DSPM will need an AWS account number in order to share the AMI.
Find the Shared AMI
- Open the Amazon EC2 console at https://console.aws.amazon.com/ec2/.
- In the navigation pane, choose AMIs under Images.

- To the left of the search box, click on the pull-down next to “Owned by me” and select Private images.

- All AMIs that have been shared with your account will be listed below. Locate Netskope One DSPM on the page. If there are too many private AMIs, type in “Netskope One DSPM” into the search bar to refine the list of private AMIs.
- Click on the check box to the left of “Netskope One DSPM Release X.X.X”, and click on the blue “Launch” button above the search box. Netskope One DSPM will then launch.
Choose an Instance Type
Choose the instance size you require (unless stated otherwise, we recommend at least an m5.2xlarge), then click Next: Configure Instance Details.
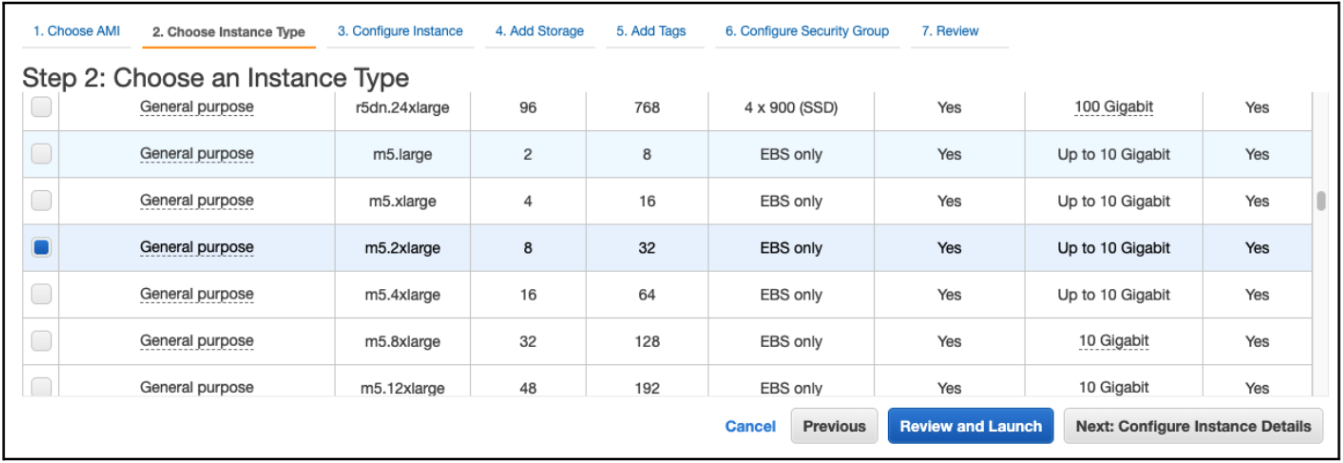
Please DO NOT click the blue Review and Launch button yet, as there are configurations needed on later screens.
Configure Launch Role
If you plan on using an assume role-based approach for authorizing connections between Netskope One DSPM and your AWS infrastructure, follow these steps to configure the AWS IAM role used when launching Netskope One DSPM instance. Otherwise, you can skip ahead to the next step.
- Log into the AWS IAM Console
- Create a new IAM Role
- Using the on-screen wizard, configure the following values:
- Name: Netskope One DSPMLaunchRole
- Save your new IAM Role
- Within EC2, select your Netskope One DSPM instance, then navigate to Actions > Security > Modify IAM Role
- In the IAM Role field, select "Netskope One DSPMLaunchRole"
- Click the Save button
For now, IAM setups are complete. Eventually, you'll define the IAM Role used by Netskope One DSPM to connect to your AWS infrastructure, including the necessary trust relationship (as defined in Setup Needed to Onboard AWS Accounts). Otherwise, if you plan to use an access key for authorization between Netskope One DSPM and your AWS account, you can skip ahead to the next step.
Configure Instance Details
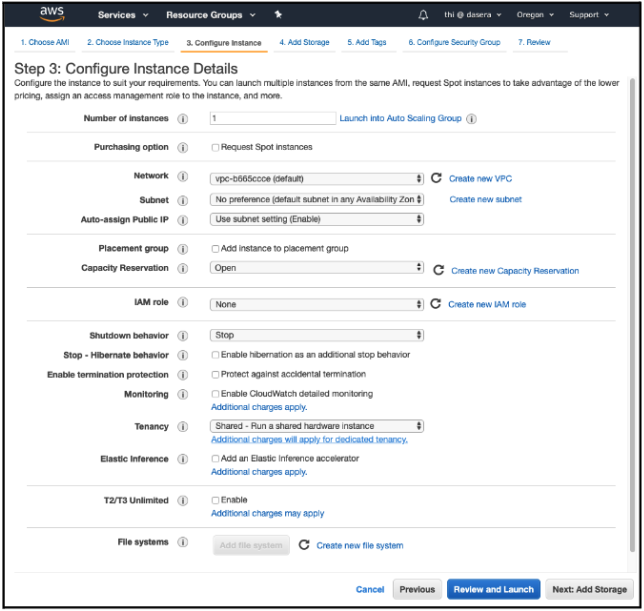
When configuring the instance details, change the default settings for the following parameters:
- Network – Choose a VPC with a subnet in the same Availability Zone as the Redshift cluster(s) you want Netskope One DSPM to monitor. An Availability Zone is Amazon’s terminology for a physical data center, and you want Netskope One DSPM running in the same data center as your Redshift cluster(s). If you have Redshift clusters in different availability zones, you must launch a separate Netskope One DSPM instance in each availability zone. See below to determine which Availability Zone your Redshift cluster is in.
- Auto-assign Public IP – "Enable" is recommended but not required. If a public IP address isn't enabled, Netskope One DSPM users must have some other way (e.g., VPN) to access the Netskope One DSPM instance.
- IAM role – select "Netskope One DSPMLaunchRole" if configured above; otherwise, leave this blank
- Select the IAM role that you created for the Netskope One DSPM instance (see Step 4 below)
- Enable termination protection – Check this box.
- Monitoring – Check this box if you want to use CloudWatch to monitor Netskope One DSPM.
If you don’t know the VPC of your Redshift cluster, follow these quick steps:
- Open a new tab.
- Go to your AWS management console.
- Type “Redshift” in the Find Services field.
- Click on Clusters in the left nav.
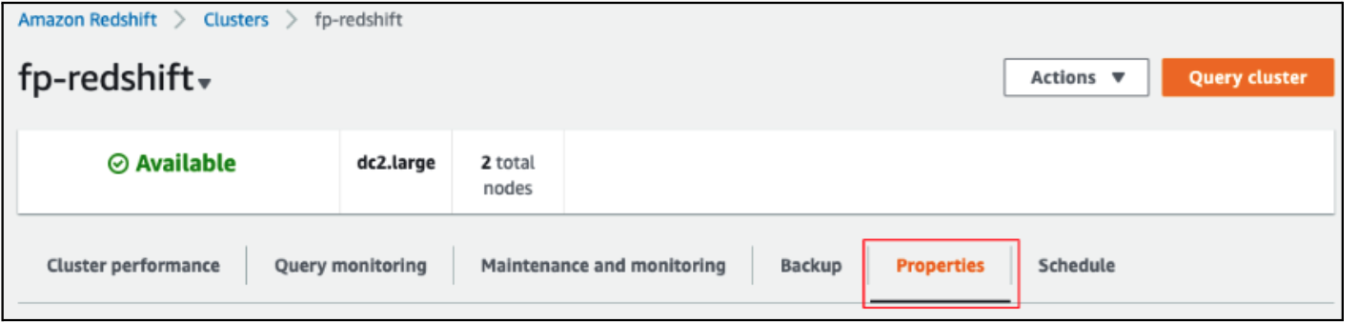
- Click on a cluster that you will want Netskope One DSPM to scan.
- In the top nav under the Cluster name, click on Properties.
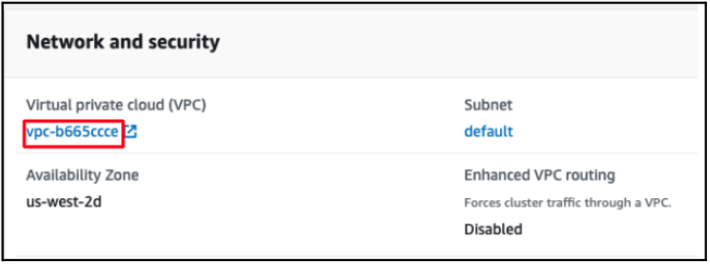
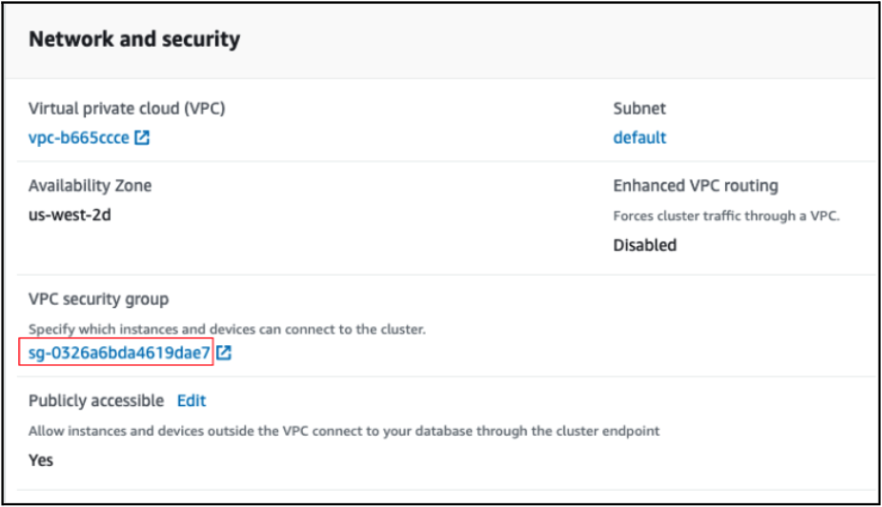
- Scroll down to “Network and security”. Find “VPC”.
Important Note: Please leave all other options as default. Specifically, we strongly recommend keeping Shutdown behavior as "Stop." Stop will prevent Netskope One DSPM data stored on EBS volumes from being deleted, should you reinstall Netskope One DSPM later.
Add Storage
- We recommend an EBS volume size of at least 40 GB for your Netskope One DSPM EC2 instance. However, EBS volume may vary based on both your query volume and your data retention needs. Please check with your Netskope One DSPM Customer Success Manager if a different EBS volume is recommended.
- Keep all other defaults.
- Netskope One DSPM stores data on its own local database. If you would like this data to be encrypted at rest, select the KMS Key Alias/Key ID you would like to use to encrypt the EBS volume associated with the Netskope One DSPM instance.
- Click Next: Add Tags at the bottom of the page.
Add Tags
- Add any instance tags you require.
- Click Next: Configure Security Group.
Configure Security Groups
- A security group should be created with the minimum set of ports. If required, name and adjust the security group according to your security requirements.
- The default recommended security group uses SSH (port 22), and HTTP (port 80) for access to the instance. The range of allowed IPs should be tailored to your needs.
- Click Review and Launch.
Recommendation: Putting Netskope One DSPM into the same security group your Redshift clusters are in is an easy way to avoid connection problems. Note, however, that the security group must allow HTTP on port 80. We also recommend including SSH port 22 so you can have SSH access to the machine.If you don’t know the security group of your Redshift cluster, follow these quick steps:
- Open a new tab.
- Go to your AWS management console.
- Type “Redshift” in the Find Services field.
- Click on Clusters in the left nav.
- Click on a cluster that you will want Netskope One DSPM to scan.
- In the top nav under the Cluster name, click on Properties.

- Scroll down to “Network and security”. Find “VPC security group”
Review Instance Launch
You’re now ready to launch your Netskope One DSPM AMI. Hit the blue Launch Instance button at the bottom-right corner.
AWS will ask you to “Select an existing key pair or create a new key pair”. This is for SSH access to the Netskope One DSPM EC2 instance. You can choose an existing key pair, create a new key pair, or proceed without a key pair. 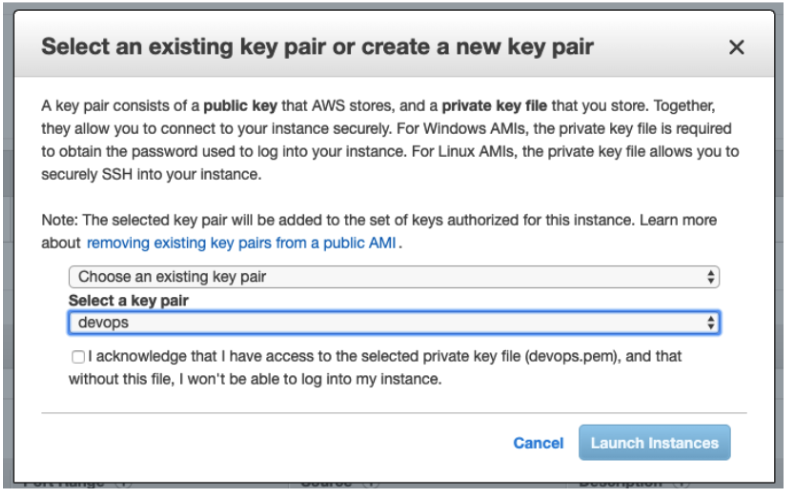
Wait a few minutes until the Netskope One DSPM instance is launched, you can then access Netskope One DSPM by entering the hostname or IP of the instance into a web browser.
Configure Proxy Settings
If your VPC and subnet has no public IP and/or routes traffic through a proxy, SSH into the instance.
Run:
discovery stop
to stop the Netskope One DSPM application. Then, add the following lines to .bashrc (replacing with your own proxy address).
export HTTP_PROXY=12.34.56.78:9000 export HTTPS_PROXY=12.34.56.78:9000
Finally, restart the Netskope One DSPM instance:
discovery start
Congratulations! Your Netskope One DSPM instance has now been launched. The launch process may take a few minutes.