The following instructions apply to self-hosted Dasera applications deployed using either AWS CloudFormation or AWS Terraform. For instructions on accessing Dasera for Helm-based deployments, please visit our Installing Dasera application and sidecars using AWS Helm article.
After launching the Dasera AMI in AWS, you can access your Dasera instance by clicking on the “View Instances” button in the bottom right corner of the “Launch Status” page.

If you’ve already closed the launch status page, return to the AWS Console and return to the EC2 dashboard to find the Dasera instance, based on the instance type, date/time of creation, key name, and/or security group that you used to create it.
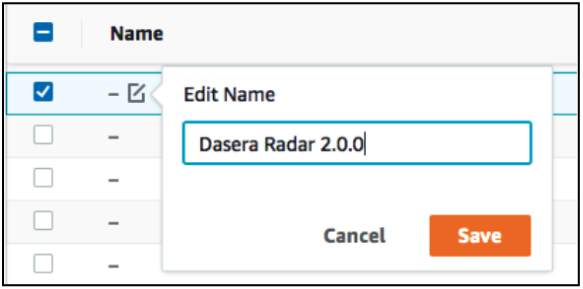
The name of the instance will be blank “-”. You should rename the instance by mousing over the blank name, clicking on the edit icon, and giving the instance an easily recognizable name like “Dasera v1.2”. Click “Save” below the name.
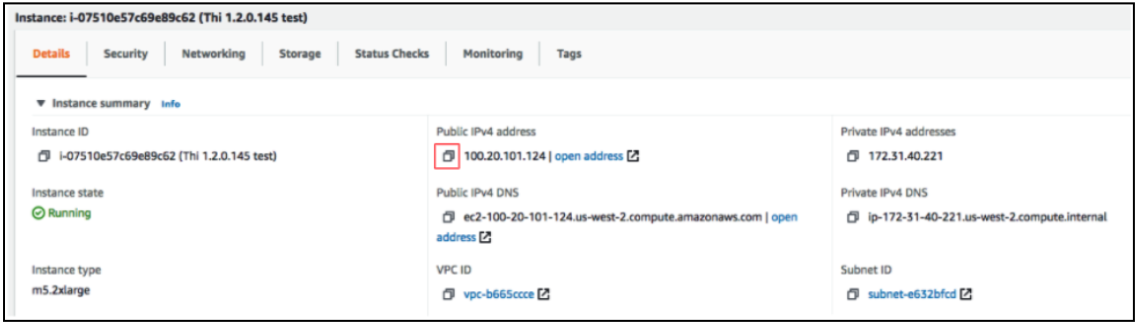
To access the Dasera instance, select the box next to the Dasera instance and view the lower half of the screen. Find the public IP address of the EC2 instance Dasera is running on. You may want to bookmark this IP address or host name for future Dasera logins. Click the copy icon next to the IP address, open a new tab, and copy that IP address into the address bar of the new tab.
We recommend connecting to the Dasera instance either via VPN or SSH tunneling. The communication between your browser and the Dasera EC2 instance is not sent over HTTPS because the Dasera instance cannot generate its own SSL certificate. To establish a secure connection to the Dasera instance, you will need to set up an HTTPS listener using a AWS Application Load Balancer.
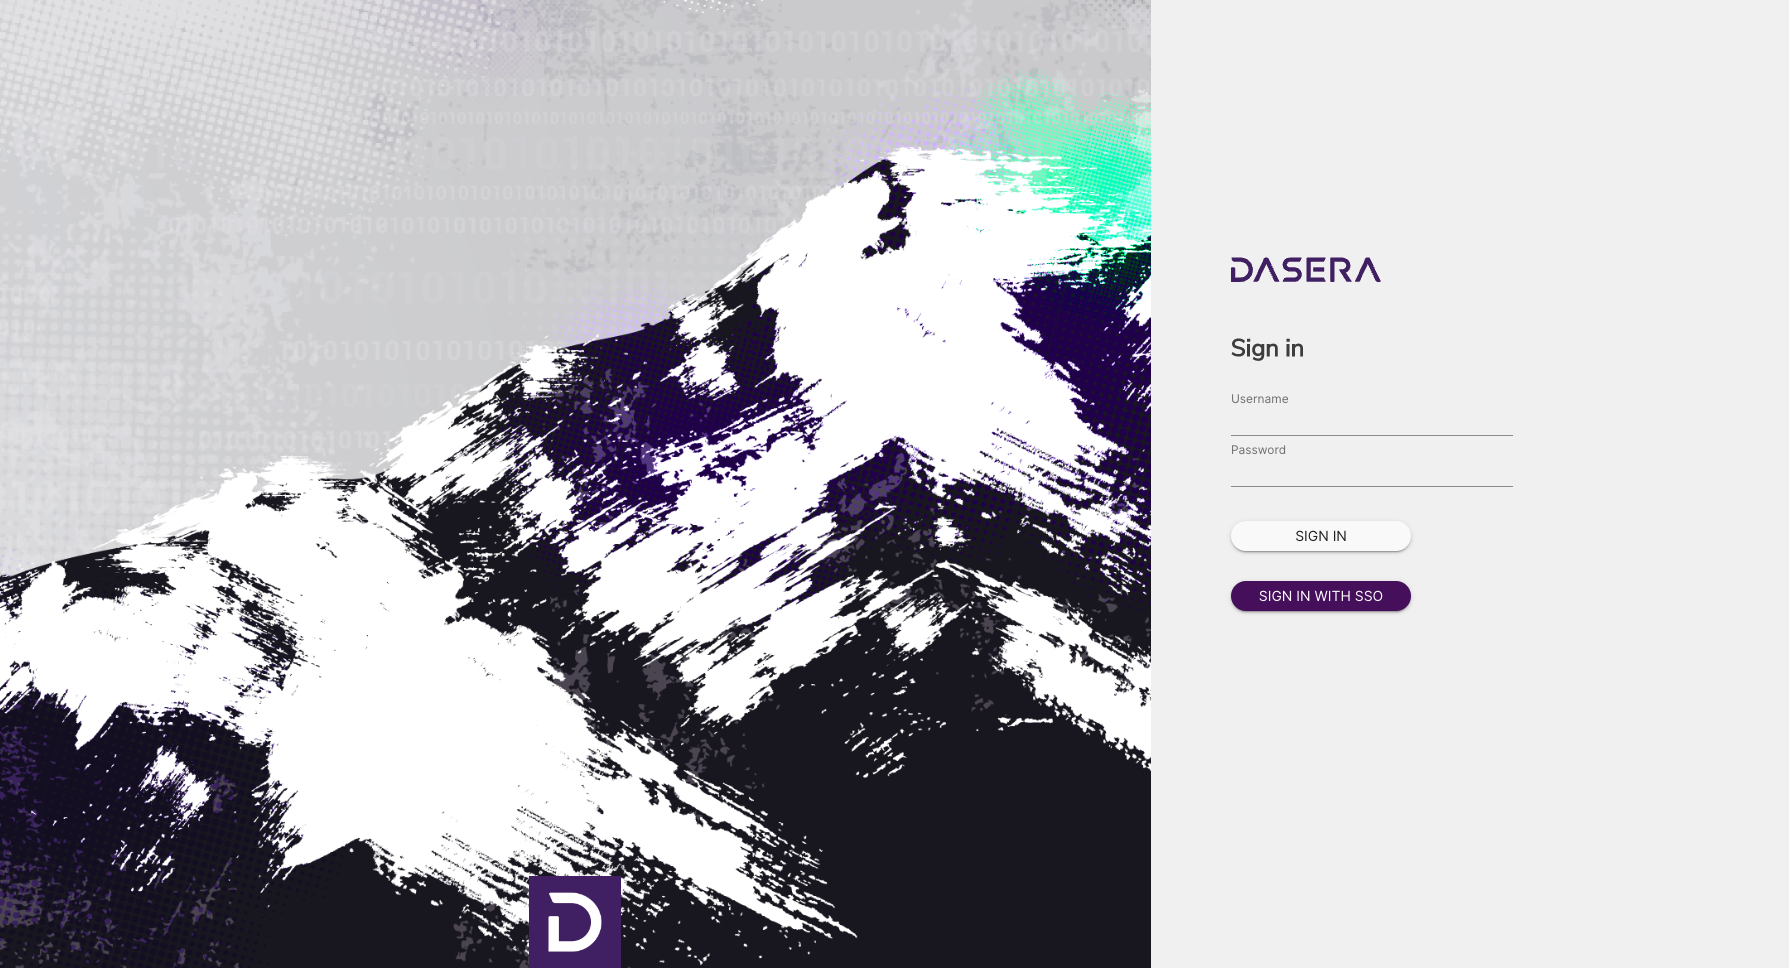
Open up a new tab in your browser (while keeping the EC2 tab open). In the new tab, paste the IP address or host name you just copied in the step above. You should see the Dasera sign-in screen, below.
Go back to the EC2 tab, and look again at the lower half of the page for the Dasera instance. Mouse over the “Instance ID” and click the “Copy” icon next to the Instance ID.
Go back to the Dasera tab. For the User ID, enter “ec2-user”. For the Password, paste the Instance ID from the step above.